On gear and glass and how to get started
This is the second part of my series on photography. Click here for Part I and here for the overview.
Photography has a very technical side to it that can be much fun to nerd about. At the same time, the many options are often overwhelming for people new to it. And whereas new possibilities are fascinating for the pro, their price tags make them rather frustrating for the amateur. I remember well getting lost in the “research”, trying to figure out which feature is really worth the hundreds of euros it would cost me. Here, I want to offer my perspective on these questions.
Use equipment that you enjoy
As I argued before, the amateur’s way to photography is to focus on the joy it brings to your life. For those looking for the right camera, there is an obvious lesson from this: Chose the equipment that you like to work with and that sparks your curiosity. Modernity introduces a small caveat, of course, as advertising inclines us to prefer the best and most expensive. Your favourite brand and YouTube-influencer will get you excited about the new model’s megapixels, autofocus, and extras, the latest lens’ sharpness and speed. That this kind of “joy” oftentimes feels rather stressful can be a good warning. Practice JOMO, not FOMO, and allow yourself to take aesthetics, size, and character as just as important.
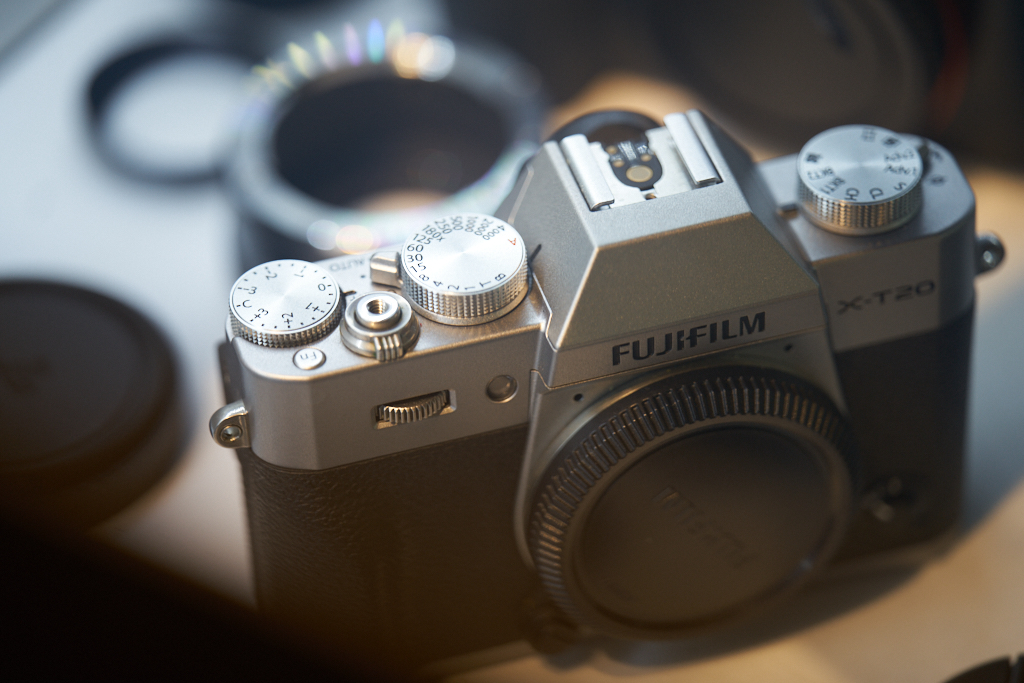
This need not mean that you have to pay extra for shiny looks. Quite the opposite, just don’t worry about numbers so much. Don’t worry if you prefer Fuji’s classy design and easily accessible dials over another model with a better rating. If you like to have a small camera with a bit of retro feeling, take Sony’s a7c despite its small viewfinder – Joel Meyerowitz would approve – or get a bulkier model if a proper view is more important for you than a slice of metal. And if being ultra mobile and shooting everything on your iPhone is what you enjoy, stick to it or keep flirting with Rico’s compact cameras, instead of investing hundreds and thousands of euros for a full-frame system. Especially for an amateur, photography is a practice, not a product category. If you want to take better pictures and enjoy taking them, better equipment lies at the end of your journey, not the beginning.
Get gear that gets your job done
So, costs and aesthetics are a good way to start: You can’t take photos with a camera you don’t have, and you won’t use the one you have if it is not fun. Continuing from there, several questions are important to consider: What kind of photos do you want to take, e.g., portraits, landscapes, or street-photography? How mobile do you want to be with your camera, do you want to go hiking with it, or even travel? How flexible do you want to be with regard to its use? And of course: What are the quality requirements you cannot live without?
What a camera is – on bodies and lenses
With these questions in mind, you have to basically answer two questions: What body do you want to have, and what lenses? The body is your starting point and it will likely lock you into a certain system. Generally, many systems allow you to combine a camera body with different lenses, which gives you more flexibility and makes it easier to upgrade your kit later. While most of the professional systems come with separated bodies and lenses, there are excellent cameras that combine both (e.g., Leica’s Q-series), and you might like their minimalist simplicity.
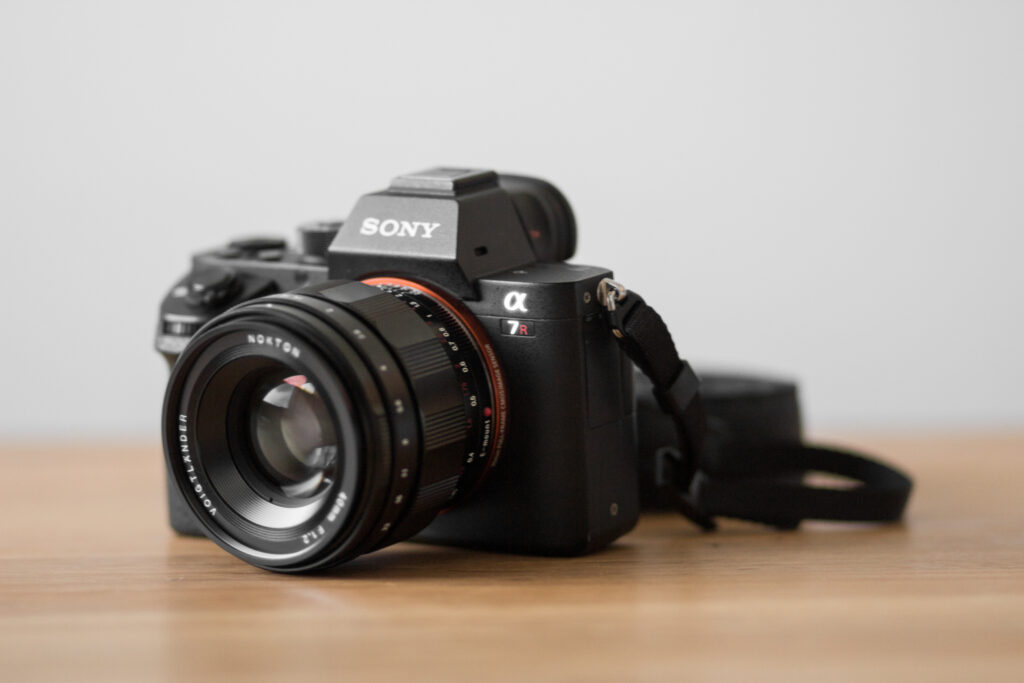
When it comes to the camera body, there is a strong focus on camera brands. As far as I can tell, Canon, Fuji, Leica, Nikon, Panasonic, Sony and the like all take great photos. When you do your research, try to get your hands on a camera and try it to experience how it feels and what it is for you. For example, Leica’s cameras feel precious and unique, but given their price and not-above-average image quality, many people I know think of them more like a luxury lifestyle brand. I chose Sony’s a7 series, as they where the first to move into the current full-frame system camera paradigm, and I am very happy with it. They offer great quality for their price and have a huge selection of different lenses with few “holes” in their offer. From what I have heard, the other brands are catching up quickly and you shouldn’t have problems with either system.
The glass you pay for
As many photographers will tell you, your lens kit is usually more important than your camera body. The body determines which lenses you can use, but despite all the electronics, much of taking photos is still about how the light hits your sensor and thus purely optical. Hence, you want proper “glass”.
(This is a crucial difference if you come from smartphones. Apple and Google are great in post-production and much of their image quality is computational. The advantage of „real“ cameras often lies in the superior information depth and potential of their (.)raw images, which you often want or even have to work on afterwards. To simplify a bit: smartphone images are mostly good, camera images are easy to mess up but have the possibility of getting excellent.)
With lenses, you will face your main trade-offs. The important dimensions are build quality, size/weight, image quality, “speed” (this refers to aperture and is hence very important for the nice blurry “bokeh” you see in professional photos) and various additional functions. Even if price is not an important dimension for you, you will likely have to make certain trade-offs. There are physical limits to how small and light an optically perfect, fast lens can be. While there are better and worse lenses, you typically get what you pay for, which is why I want to highlight two tricks to get more for your money and/or size factor: A popular strategy is to choose prime lenses over zoom lenses. A more rebel one to pick manual focus lenses over autofocus ones.
Prime lenses and creative constraints
Cameras have different focal lengths, typically measured in mm. Images that look normal have a focal length around 50mm (for full-frame sensors). Ultra wide-angle lenses are those below 24mm, they allow you to see more of a room but images often look distorted. Telephoto lenses are those above 70mm-ish. With them you can see things up-close, but they lead to a different kind of distortion that looks more collapsed.
Zoom lenses allow you to switch between different focal lenses, to zoom in or out. It is a quite natural and cool thing to do and probably the first thing you try with a “real” lens.
Prime lenses are lenses that take this fun away from you, as they have a fixed focal length. A 50mm prime lens for example basically allows to to take photos as if you would freeze and cut out a small area of what you naturally see. As the camera is very much smaller than your natural field of vision, this area might feel rather small compared to your usual view or what you are used to from smartphones (they traditionally use wide angle lenses, even though modern smartphones offer additional focal lengths).
The big advantages of prime lenses is that they are smaller, less expensive, faster and/or have better image quality compared with zoom lenses of the same price category. For example, an original middle-class zoom lenses by Sony (24mm-70mm) costs around 1.800€, while their 50mm lens with otherwise the same or better specs costs around 600€, is smaller, and weights four times less.
Now, being able to zoom in and out is of course nice and fun, but there is one reason you won’t miss it as much as you might think: You can move around. Seen like this, taking prime lenses over a zoom lenses becomes a creative constraint and forces you to interact more with the environment. If you see photography as a dialogue between you and the world around you, this can almost be an advantage! (Especially at the beginning, being forced to move also teaches you to imagine your image from different points of view. Having a wide-ranging zoom lens can on the other side make it just a little bit too easy to just stay where you are. This is something to easily get around with more experience, of course.)
Going fully manual
The second trick – much more extreme than choosing prime lenses – is to go fully manual. Lenses are optical instruments with various individual lenses inside the “lens” (i.e., the whole objective) that have to be adjusted to focus on people, faces, eyes, etc.
Traditionally, you had to focus manually by adjusting the lenses through a single focus ring at the outside. You would have to trust your eyes to see whether your image is sharp or not – often not too easy if you look through a small viewfinder.
It is one of the main features of modern lenses that they allow you to focus automatically, for example by tapping on your screen or adjusting the autofocus. State-of-the-art autofocus technology is a technical marvel that allows you to focus on the eye of a flying bird. Much of the electronics in your lens is there to allow them to do this by physically shifting the individual lenses back and forth. Even in normal situations, this is usually much easier and faster than doing it by hand, and while most lenses still allow for manual focusing, you will probably not use it a lot as the equipment is not built for it, it takes a little experience, and hence many images will first end up blurry and out of focus.
Naturally, getting rid of the additional electronics in your lens makes it much simpler, smaller, and cheaper. There are mainly two ways you can take an advantage of this. The cheapest way is to use old lenses from times before autofocus – most often with an adapter. As demand isn’t strong, you can often grab lenses that used the be exquisite and are still good quite cheaply (around 100€) on the secandary market. The second way is to use modern manual lenses. These lenses use advances in optical technology to be as sharp or sharper than modern lenses and feature an electronic connection with your camera that allows to exchange data and gives you good guide-rails to focus manually.
I have gone fully manual since switching to Sony, getting all my lenses from Voigtlander – and I truly love it, for several reasons. First, the image quality is excellent. Colors are amazing, the images are sharp, the bokeh is beautiful with a nice traditional dreamy touch, and the sun stars are a welcome sexy extra. Second, Voiglander lenses are not cheap, but you get a lot for what you pay. The build quality is excellent, they feel dense and have a nice retro touch. Additionally, they let a lot of light in. Voigtlander’s 50mm prime, which costs about 1000€, has an aperture of 1.2 – this is the kind of lens that not only allows you to shoot with little to no direct light, but to focus on your subject’s eyes and have her ears already slightly blurred. For comparison, Sony’s brilliant 1.2 G-Master prime costs twice s much, is three times as long, and weights almost twice as much. (Granted, you typically want to use your fast Voigtlander at f2.8 or something where they are perfectly sharp, a problem I expect you should not have with the G-Master. At the same time, if “only” f2 is enough for you, Voigtlanders optically perfect 50mm APO Lanthar might be the sharpest lense of its kind.) Finally, and most importantly, they are a joy to use. The focus rings are buttery smooth, the electronic contacts allow for various support functions to get the focus perfect, and after getting used to it, I feel it often gives me more freedom to directly position the focal plane (the plane parallel to your lense where your image is perfectly sharp). Call me a romantic, but I actually enjoy that I have to work for the picture and that the camera is not doing the job for me.
That being said, I have missed a couple of shots as focusing took too long, and shooting from the hip is difficult and requires a lot of experience, something that might be a disadvantage especially for street photography.
My kit
When looking for a new kit after stepping up from my old beginner camera (a dated Canon 700D with the nifty fifty prime lens), I was looking for a kit with a unique character, that I can really push when it comes to image quality, and that is still (relatively) affordable. After some deliberation, I bought a Sony a7R II body on the secondary market for about 1000€ and am very happy with it. Sony’s a7R series is aimed at professional photographers, which comes with some trade-offs for video. The a7R II is already rather old – the current version is the a7R IV – which makes it cheap when bought used. (In comparison, the current alrounder, the a7 IV, is around 2800€, the a7R IV even 4000€.) Still, the sensor is amazing, 42 megapixel are more than enough (after all, you need storage for the 43MB files), and since I am shooting manual, I don’t care about the older autofocus anyway.
As for lenses, my goto everyday everywhere and always lens is Voigtlander’s 40mm f1.2. 40mm is still great for taking normal portraits but slightly wider than 50mm, which allows you to take that little bit extra of the surrounding. Using the lens indoors, I often find myself pressed against the wall to get just as much as I want to, but I rarely was hoping for a 35mm instead. The lens is far from perfect at f1.2, but it’s slight flaws have character. It is good at around f2.8 and very sharp below f4.0. Nonetheless, having f1.2 means there are few situations where it’s too dark to take a picture and nice to have in those settings where you want to separate the subject from the background just a little bit more. Best of all, the lens is small. With just about 6cm in length, I can slip the whole camera into almost any bag. It is slightly bigger (and probably a lot heavier) than compact cameras but not something that I’m every worried about carrying around. All this makes it very very versatile, I use it for portraits, landscape, event, and street photography, take it on a hike and find a place for it while traveling.
Of course, any prime lens has its boundaries. I hence recently bought Voigtlander’s 21mm (f3.5). I am still learning where it’s best, but it is definitely great with architecture, indoors, and for landscape settings, where the extra width can shine. There is a much more expensive and heavy f1.4, but during the day f3.5 is enough, and with 21mm you will struggle to make use of low apertures to separate the background anyway. I am also toying with the idea to get the 110mm as a tele, macro, and good portrait lens. But one after the other…
More information
I want to highlight a few places I found very helpful.
First, the folks at Sony and Voigtlander are doing an excellent job. If you are interested in Voigtlander lenses, check out their list of distributors and support your local camera dealer. If you are in Taiwan, visit their partner at Camera Sharp (GoogleMaps), and say hello from me.
Second, there is a brilliant small YouTube channel by the US photographer Sam Mallory. Sam has a wonderfull zen-like style, his videography is gorgeous and full of warm-hearted details. Despite his few videos, his is probably among the best photography channels you can find. Sam’s video on the 50mm “dream lens” was also the one introducing me to Voigtlander, so an extra big thanks for you, Sam!
Third, Phillip Reevers blog offers everything you might want to know about manual lenses. His team offers great guides on Sony lenses, building a lens kit, and various other issues that help you to find the right lens. Their rolling reviews on Voigtlanders 21mm (f3.5), 40mm, and 110mm are also very helpful.
As with everything photography, social media offers good information and inspiration. The most comprehensive video reviews are probably done by Dustin Abbott (here for the 40mm), but you can find plenty more. If you are searching for images, try Flickr and Instagram, where you find further examples under hashtags like #voigtlander40mmf12, for example.